Scale your Next.js application with Drizzle ORM and Neon Postgres Read Replicas
Learn how to scale Next.js applications with Drizzle ORM's withReplicas() function and Neon Postgres Read Replicas
Neon read replicas are independent read-only compute instances that can significantly enhance database performance and scalability. By distributing read operations across these replicas, you can reduce latency and improve overall system responsiveness, especially for read-heavy applications.
A key advantage of Neon's architecture is that adding a read replica doesn't require additional storage, making it a highly efficient scaling solution. This cost-effective approach is ideal for businesses of all sizes that need to improve database performance without increasing storage costs.
This guide demonstrates how to leverage Neon read replicas to efficiently scale Next.js applications using Drizzle ORM. You'll learn how to configure your Drizzle database client to work with read replicas, enabling you to optimize your database operations and improve overall application performance.
Prerequisites
- A Neon account and a Project. If you don't have one, you can sign up for a Neon account and create a project by following the Getting Started guide.
- Basic knowledge of Next.js and TypeScript
- Node.js and npm installed on your local machine
Build the Polling app
To demonstrate how to use Neon read replicas with Drizzle in Next.js, we'll build a simple Polling application that uses a Neon database. We'll then update the application to use a read replica for read operations, improving the application's performance and scalability.
Part 1: Build the initial Polling app with a single database
Set up the project
Create a new Next.js project with all the default options:
npx create-next-app@latest polling-app
cd polling-app
Install required packages
Install Drizzle ORM and the PostgreSQL driver:
npm install drizzle-orm pg dotenv
npm install -D @types/pg drizzle-kit
Create the database schema
Create a new file db/schema.ts:
import { pgTable, serial, text } from 'drizzle-orm/pg-core';

export const pollTable = pgTable('votes', {
  id: serial('id').primaryKey(),
  option: text('option').notNull(),
  ipAddress: text('ip_address').notNull(),
});
This code defines the schema for our votes table. It has an auto-incrementing id, an option field for the vote choice, and an ipAddress field to track unique voters.
Set up the Drizzle client
Create a new file db/drizzle.ts:
import { drizzle } from 'drizzle-orm/node-postgres';
import { Pool } from 'pg';
import 'dotenv/config';

const pool = new Pool({
  connectionString: process.env.DATABASE_URL,
});

export const db = drizzle(pool);
This code sets up the Drizzle ORM client. It creates a connection pool using the DATABASE_URL from our environment variables and initializes Drizzle with this pool.
Update .env
Add the Neon database connection string:
DATABASE_URL=postgres://your-username:your-password@your-neon-host/your-databaseThis environment variable stores the connection string for your Neon database.
Set up migrations and create tables
Add the following scripts to your package.json:
{
  "scripts": {
    ...
    "migration:generate": "drizzle-kit generate",
    "migration:migrate": "drizzle-kit migrate"
  }
}
These scripts allow you to generate and run database migrations using Drizzle Kit.
Create a new file drizzle.config.ts in the root of your project:
import type { Config } from 'drizzle-kit';
import 'dotenv/config';

export default {
  schema: './db/schema.ts',
  out: './db/migrations',
  dialect: 'postgresql',
  dbCredentials: {
    url: process.env.DATABASE_URL!,
  },
} satisfies Config;
This configuration file tells Drizzle Kit where to find your schema, where to output migrations, and which database to connect to.
To generate your first migration based on your schema, run:
npm run migration:generateTo apply the migration and create the table in your Neon database, run:
npm run migration:migrateCreate the API routes
Create a new file app/api/vote/route.ts:
import { db } from '@/db/drizzle';
import { pollTable } from '@/db/schema';
import { NextRequest, NextResponse } from 'next/server';
import { eq, sql } from 'drizzle-orm';

export async function POST(req: NextRequest) {
  const ipAddress = req.headers.get('x-forwarded-for');

  if (ipAddress == null) {
    return NextResponse.json({ message: 'IP address not found!' });
  }

  const { option } = await req.json();

  const existingVote = await db
    .select()
    .from(pollTable)
    .where(eq(pollTable.ipAddress, ipAddress))
    .execute();

  if (existingVote.length > 0) {
    return NextResponse.json({ message: 'You have already voted!' });
  }

  // Insert a new vote
  await db.insert(pollTable).values({
    option: option,
    ipAddress: ipAddress,
  });

  return NextResponse.json({ message: 'Vote submitted successfully!' });
}

export async function GET() {
  const options = await db
    .select({
      count: sql<number>`cast(count(*) as int)`,
      option: pollTable.option,
    })
    .from(pollTable)
    .groupBy(pollTable.option)
    .execute();
  return NextResponse.json(options);
}
This file defines two API routes:
- The POST route handles new votes, checking for existing votes from the same IP and inserting new votes.
- The GET route retrieves the current vote counts for each option.
Create the frontend
Add shadcn-ui to the project for styling:
npx shadcn@latest init -d
npx shadcn@latest add button card
Update app/page.tsx:
"use client"

import { useState, useEffect } from "react"
import { Button } from "@/components/ui/button"
import { Card, CardContent, CardHeader, CardTitle } from "@/components/ui/card"

export default function Component() {
  const [votes, setVotes] = useState({ Python: 0, JavaScript: 0 });
  const [loading, setLoading] = useState(false);

  useEffect(() => {
    // Fetch the current poll results when the component mounts
    const fetchPollResults = async () => {
      try {
        const response = await fetch("/api/vote");
        const data = await response.json();

        setVotes({
          Python: data.find((option: { option: string }) => option.option === "Python")?.count || 0,
          JavaScript: data.find((option: { option: string }) => option.option === "JavaScript")?.count || 0,
        });

      } catch (error) {
        console.error("Error fetching poll results:", error)
      }
    }

    fetchPollResults()
  }, [])

  const handleVote = async (option: "Python" | "JavaScript") => {
    setLoading(true)
    try {
      const response = await fetch("/api/vote", {
        method: "POST",
        headers: {
          "Content-Type": "application/JavaScripton",
        },
        body: JSON.stringify({ option }),
      })

      if (!response.ok) {
        throw new Error("Error submitting vote")
      }

      const data = await response.json()
      if (data.message === "Vote submitted successfully!") {
        setVotes((prevVotes) => ({
          ...prevVotes,
          [option]: prevVotes[option] + 1,
        }))
      } else {
        alert(data.message)
      }

    } catch (error) {
      console.error("Error submitting vote:", error)
    } finally {
      setLoading(false)
    }
  }

  const totalVotes = votes.Python + votes.JavaScript
  const PythonPercentage = totalVotes ? (votes.Python / totalVotes) * 100 : 0
  const JavaScriptPercentage = totalVotes ? (votes.JavaScript / totalVotes) * 100 : 0

  return (
    <div className="flex items-center justify-center min-h-screen">
      <Card className="w-full max-w-md mx-auto bg-gradient-to-br from-purple-50 to-indigo-50 dark:from-gray-900 dark:to-gray-800 shadow-lg">
        <CardHeader className="pb-2">
          <CardTitle className="text-3xl font-bold text-center text-purple-700 dark:text-purple-300">
            What is your favorite programming language?
          </CardTitle>
        </CardHeader>
        <CardContent className="space-y-6 p-6">
          <div className="space-y-4">
            <Button
              onClick={() => handleVote("Python")}
              className="w-full justify-between text-lg font-semibold py-6 bg-gradient-to-r from-purple-500 to-indigo-500 hover:from-purple-600 hover:to-indigo-600 transition-all duration-300"
              disabled={loading}
            >
              <span>Python</span>
              <span className="bg-white text-purple-700 px-3 py-1 rounded-full text-sm">
                {votes.Python}
              </span>
            </Button>
            <div className="h-3 bg-gray-200 rounded-full overflow-hidden dark:bg-gray-700">
              <div
                className="h-full bg-gradient-to-r from-purple-500 to-indigo-500 transition-all duration-300 ease-in-out"
                style={{ width: `${PythonPercentage}%` }}
              />
            </div>
          </div>
          <div className="space-y-4">
            <Button
              onClick={() => handleVote("JavaScript")}
              className="w-full justify-between text-lg font-semibold py-6 bg-gradient-to-r from-indigo-500 to-purple-500 hover:from-indigo-600 hover:to-purple-600 transition-all duration-300"
              disabled={loading}
            >
              <span>JavaScript</span>
              <span className="bg-white text-indigo-700 px-3 py-1 rounded-full text-sm">
                {votes.JavaScript}
              </span>
            </Button>
            <div className="h-3 bg-gray-200 rounded-full overflow-hidden dark:bg-gray-700">
              <div
                className="h-full bg-gradient-to-r from-indigo-500 to-purple-500 transition-all duration-300 ease-in-out"
                style={{ width: `${JavaScriptPercentage}%` }}
              />
            </div>
          </div>
          <p className="text-center text-sm font-medium text-gray-600 dark:text-gray-300 mt-4">
            Total votes: {totalVotes}
          </p>
        </CardContent>
      </Card>
    </div>
  )
}
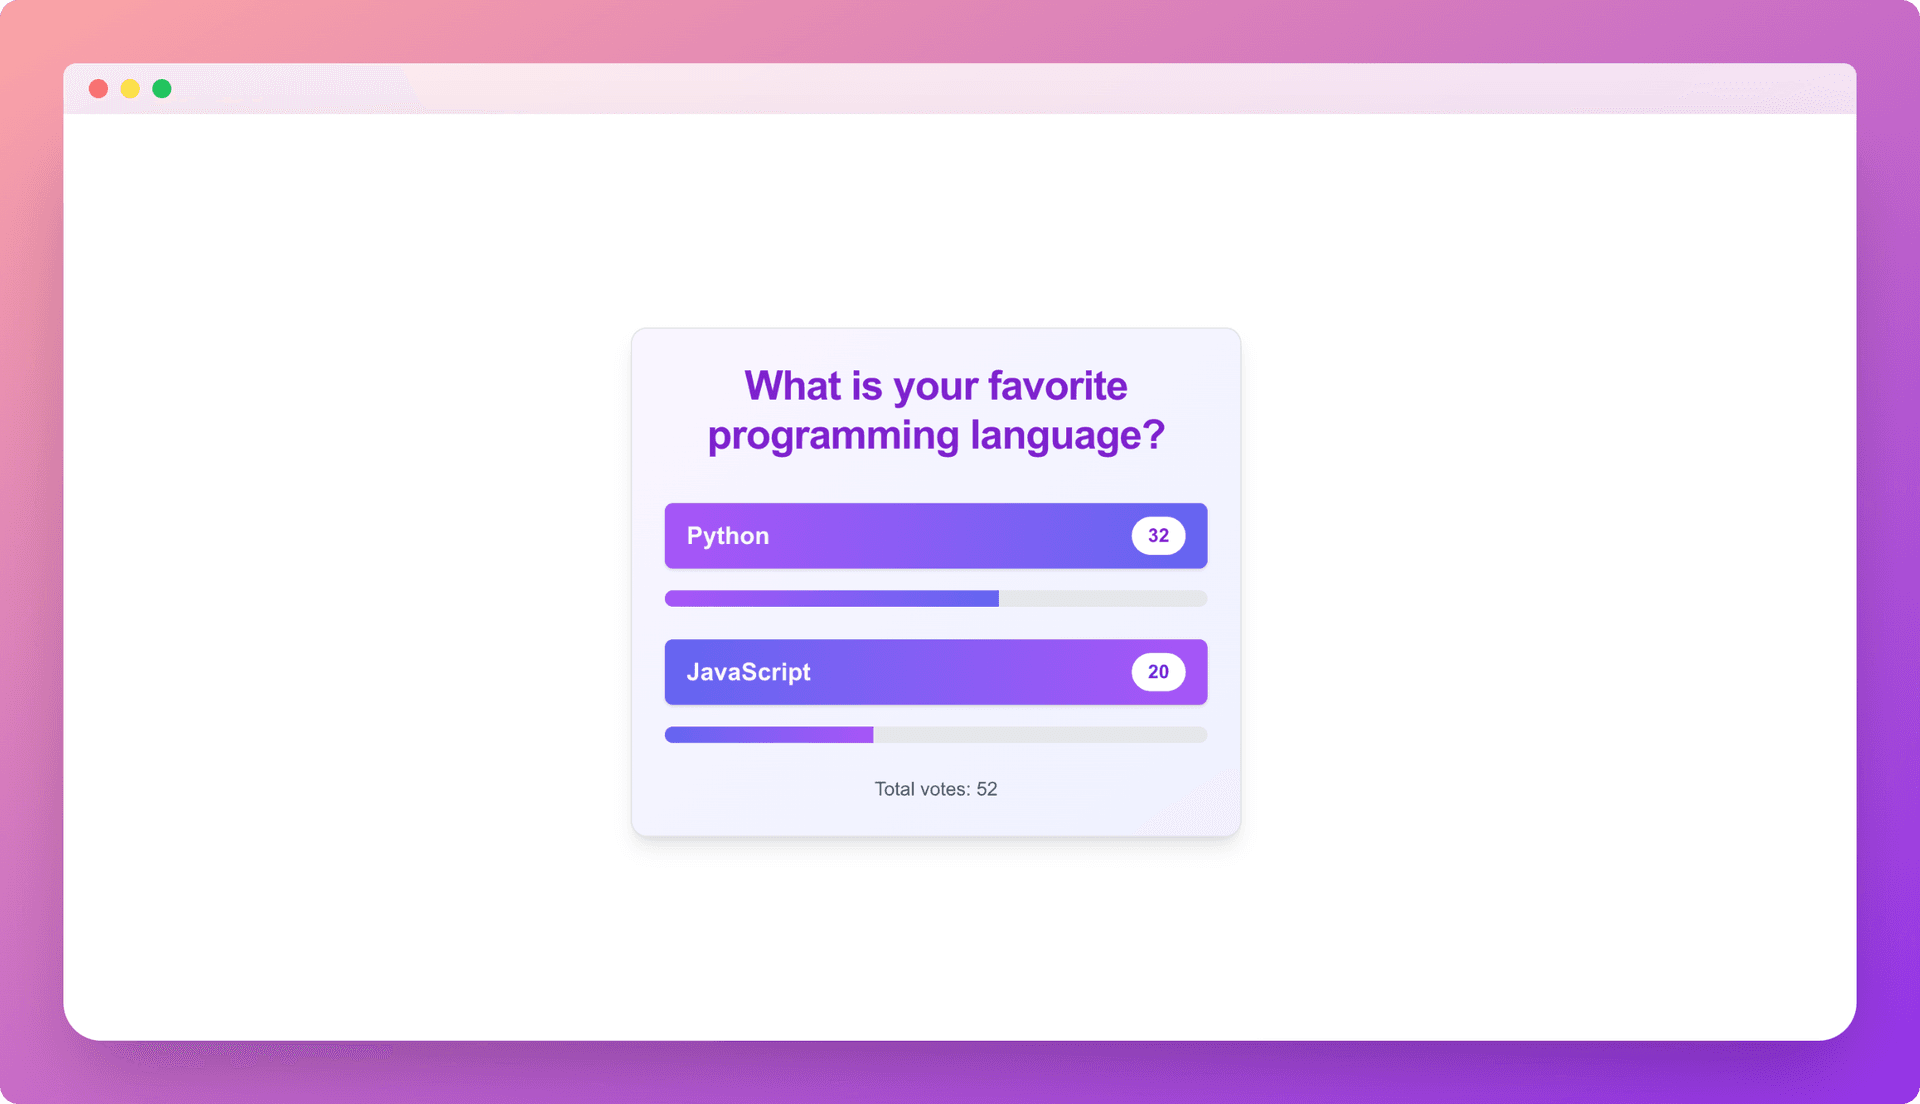
This component creates a user interface for the polling app. It includes:
- State management for votes and loading status
- An effect hook to fetch initial poll results
- A function to handle new votes
- A UI with buttons for voting and progress bars to show results
Run the application
npm run dev
Visit http://localhost:3000 to test the polling app.
Part 2: Use a read replica for read-only operations
Create a read replica on Neon
To create a read replica:
- In the Neon Console, select Branches.
- Select the branch where your database resides.
- Click Add Read Replica.
- On the Add new compute dialog, select Read replica as the Compute type.
- Specify the Compute size settings options. You can configure a Fixed Size compute with a specific amount of vCPU and RAM (the default) or enable autoscaling by configuring a minimum and maximum compute size. You can also configure the Suspend compute after inactivity setting, which is the amount of idle time after which your read replica compute is automatically suspended. The default setting is 5 minutes.
note
The compute size configuration determines the processing power of your database. More vCPU and memory means more processing power but also higher compute costs. For information about compute costs, see Billing metrics.
- When you finish making selections, click Create.
Your read replica compute is provisioned and appears on the Computes tab of the Branches page.
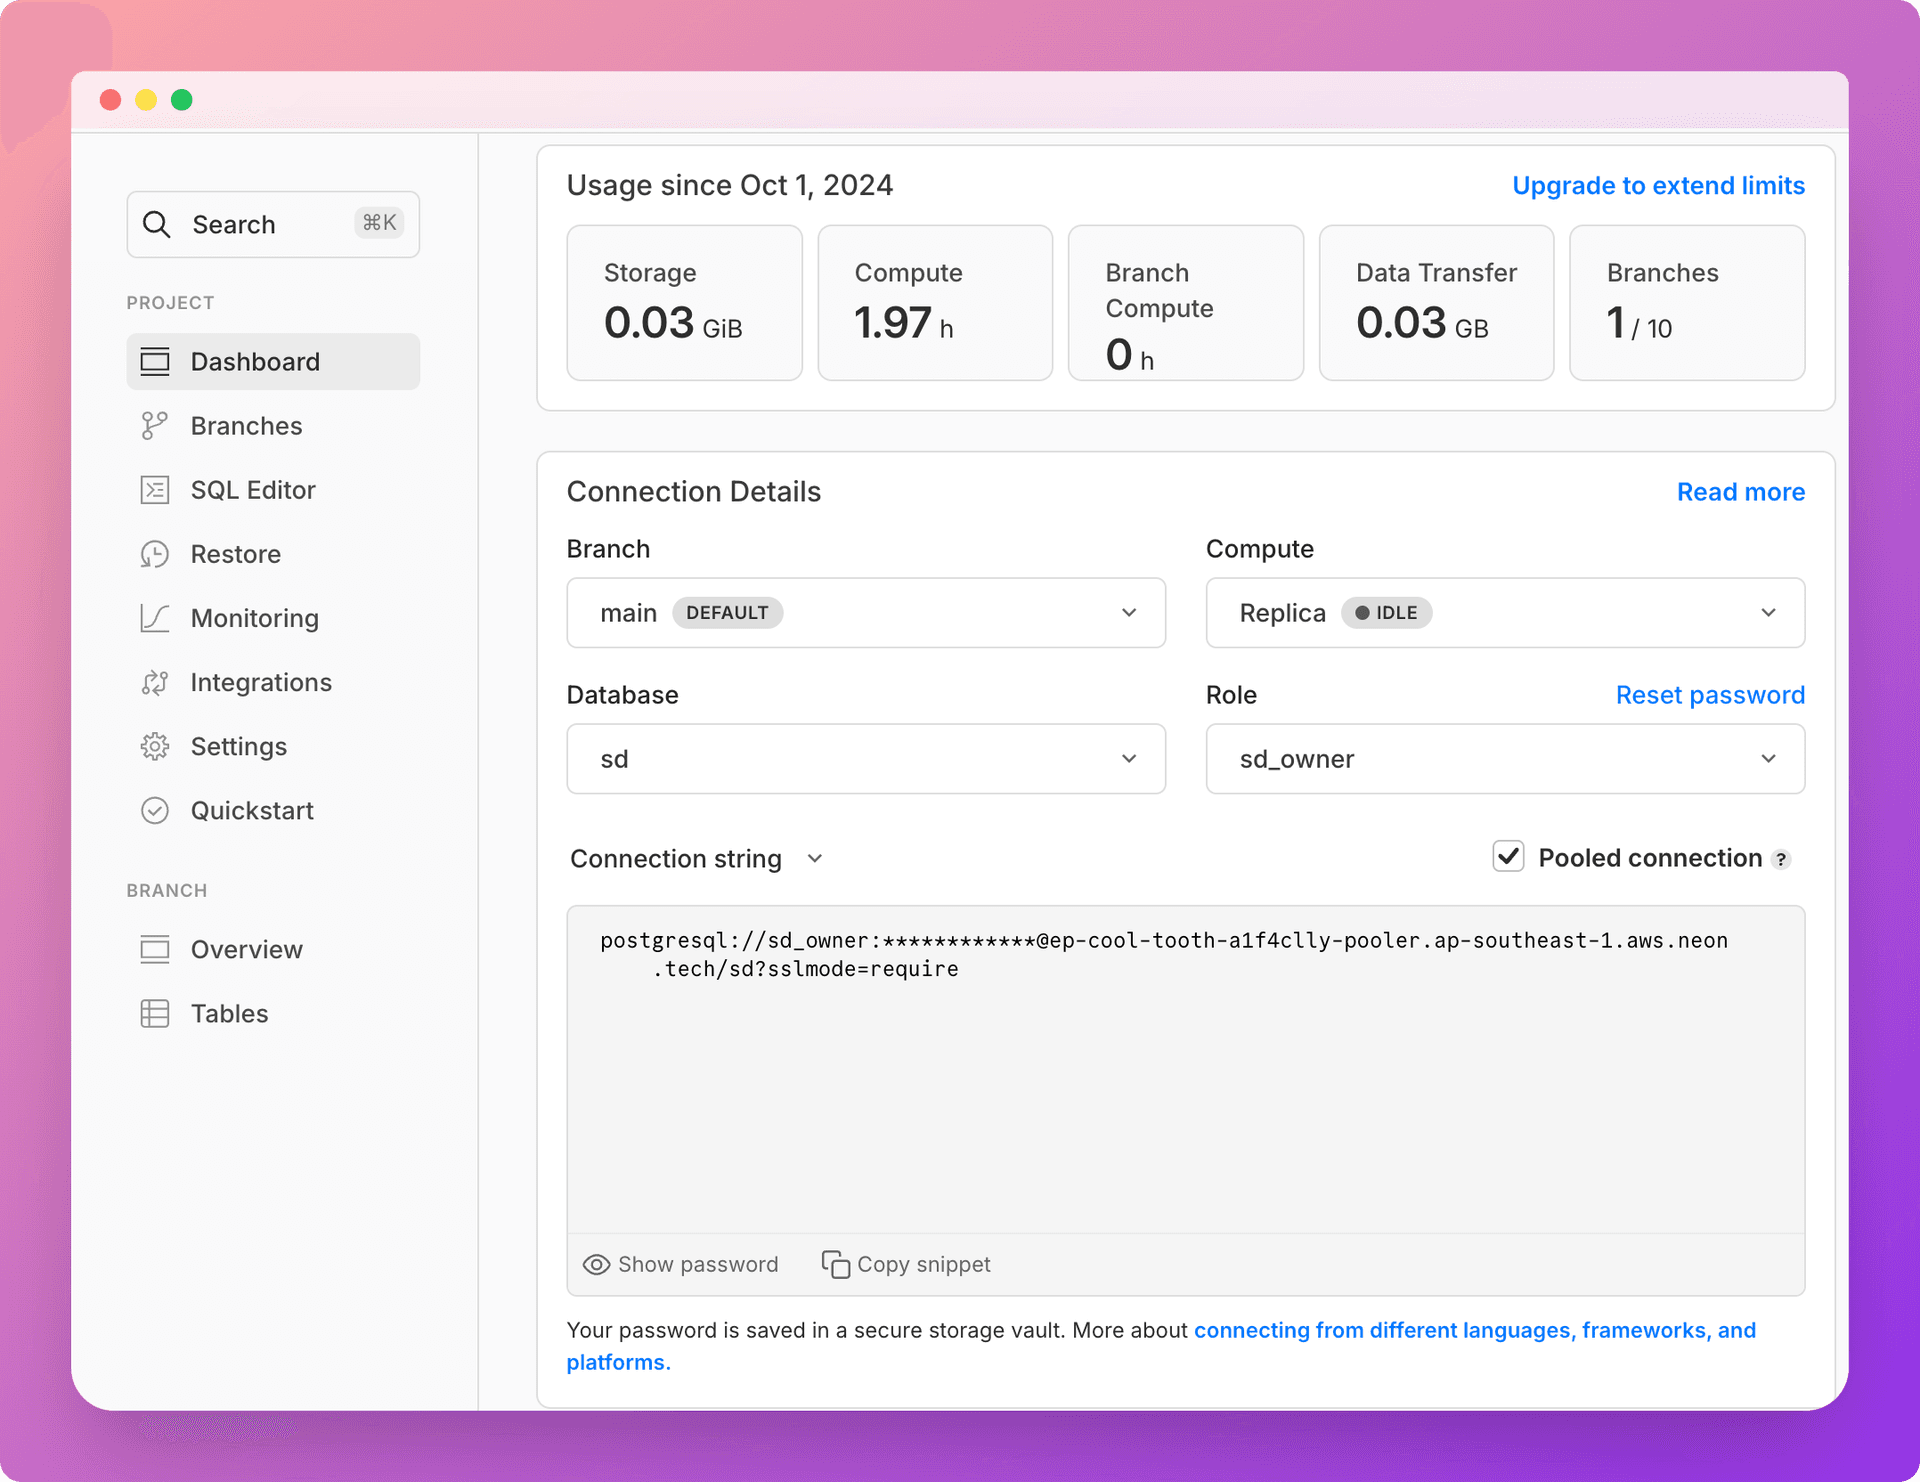
Navigate to the Dashboard page, select the branch where the read replica compute was provisioned, and set the compute option to Replica to obtain the read replica connection string:

Update the Drizzle client
Modify db/drizzle.ts:
import { drizzle } from 'drizzle-orm/node-postgres';
import { withReplicas } from 'drizzle-orm/pg-core';
import { Pool } from 'pg';
import 'dotenv/config';

const primaryDb = drizzle(
  new Pool({
    connectionString: process.env.DATABASE_URL!,
  })
);
const read = drizzle(
  new Pool({
    connectionString: process.env.READ_REPLICA_URL!,
  })
);

export const db = withReplicas(primaryDb, [read]);
This setup uses Drizzle's withReplicas function to create a single database client that can handle both primary and read replica connections. It automatically routes read queries to the read replica and write queries to the primary database.
Update .env
Add the read replica connection string:
DATABASE_URL=postgres://your-username:your-password@your-neon-primary-host/your-database
READ_REPLICA_URL=postgres://your-username:your-password@your-neon-read-replica-host/your-database
These environment variables store the connection strings for both your primary database and the read replica.
note
You can also pass an array of read replica connection strings if you want to use multiple read replicas. Neon supports adding multiple read replicas to a database branch.
const primaryDb = drizzle(
  new Pool({
    connectionString: process.env.DATABASE_URL,
  })
);
const read1 = drizzle(
  new Pool({
    connectionString: process.env.READ_REPLICA_URL_1,
  })
);
const read2 = drizzle(
  new Pool({
    connectionString: process.env.READ_REPLICA_URL_2,
  })
);
const db = withReplicas(primaryDb, [read1, read2]);
If you want to read from the primary compute and bypass read replicas, you can use the $primary() key:
const posts = await db.$primary().post.findMany();You can find the source code for the application described in this guide on GitHub.
Conclusion
By leveraging Neon's read replicas with Drizzle in your Next.js application, you can significantly improve your application's performance and scalability. Drizzle makes it easy to set up and use read replicas without having to manually manage multiple database connections in your application code.
This setup allows you to distribute your read load across one or more read replicas while ensuring that all write operations are performed on the primary database. Monitor your application's performance and adjust the number of read replicas as needed to handle your specific load requirements.
Need help?
Join our Discord Server to ask questions or see what others are doing with Neon. Users on paid plans can open a support ticket from the console. For more detail, see Getting Support.