Scale your Django application with Neon Postgres Read Replicas
Learn how to scale Django applications with Neon Postgres Read Replicas
Neon read replicas are independent read-only compute instances that can significantly enhance database performance and scalability. By distributing read operations across these replicas, you can reduce latency and improve overall system responsiveness, especially for read-heavy applications. A standout feature of Neon is that adding a read replica doesn't require extra storage. This makes it a cost-effective way to scale your database, suitable for businesses of all sizes.
This guide explains how to integrate Neon read replicas into your Django application. You'll learn how to configure your Django database router to direct read operations to these replicas, optimizing your database performance and overall application speed.
Prerequisites
Before you begin, make sure you have:
- A Neon account and project. If you don't have one, sign up for a Neon account and create a project by following the Getting started guide.
- Basic knowledge of Django and Python.
- Python installed on your local machine.
Build the note-taking app
To demonstrate how to use Neon read replicas with Django, we'll build a simple note-taking application that uses a Neon database. We'll then update the application to use a read replica for read operations, improving the application's performance and scalability.
Part 1: Build the initial note-taking app with a single database
Set up the project
Create a new Django project and app:
python -m venv venv
source venv/bin/activate # On Windows, use venv\Scripts\activate
pip install django psycopg2-binary
django-admin startproject django_notes
cd django_notes
python manage.py startapp notes
This creates a new virtual environment, installs Django, and sets up a new Django project called django_notes. We also create a new app called notes, which will contain the logic for managing notes. For the database driver, we use psycopg2-binary to connect to a PostgreSQL database.
Update settings
In django_notes/settings.py, add the following:
INSTALLED_APPS = [
    # ... other apps
    'notes',
]

DATABASES = {
    'default': {
        'ENGINE': 'django.db.backends.postgresql',
        'NAME': 'your_neon_database_name',
        'USER': 'your_username',
        'PASSWORD': 'your_password',
        'HOST': 'your_neon_host',
        'PORT': '5432',
    }
}
The INSTALLED_APPS array is updated to include the notes app we just created. The DATABASES dictionary is also updated to use a PostgreSQL database on Neon.
Create the Note model
In notes/models.py, add:
from django.db import models

class Note(models.Model):
    title = models.CharField(max_length=200)
    content = models.TextField()
    created_at = models.DateTimeField(auto_now_add=True)

    def __str__(self):
        return self.title
The Note model defines the structure for storing notes in the database. Each note will have a title, content, and a created_at field, which is automatically populated with the current timestamp when a note is created.
Create views
In notes/views.py, add:
from django.shortcuts import render, redirect, get_object_or_404
from .models import Note
from django.views.decorators.http import require_http_methods

@require_http_methods(["GET", "POST"])
def create_note(request):
    if request.method == "POST":
        title = request.POST.get('title')
        content = request.POST.get('content')
        Note.objects.create(title=title, content=content)
        return redirect('list_notes')
    return render(request, 'notes/create_note.html')

def list_notes(request):
    notes = Note.objects.all().order_by('-created_at')
    return render(request, 'notes/list_notes.html', {'notes': notes})

@require_http_methods(["POST"])
def delete_note(request, note_id):
    note = get_object_or_404(Note, id=note_id)
    note.delete()
    return redirect('list_notes')
Three views are defined here:
create_note: Handles both displaying the note creation form (GET request) and saving the new note (POST request).list_notes: Fetches and displays all the notes ordered by the creation time, showing the newest ones first.delete_note: Handles the deletion of a specific note based on its ID.
Set up URLs
In django_notes/urls.py:
from django.urls import path
from notes import views

urlpatterns = [
    path('', views.list_notes, name='list_notes'),
    path('create/', views.create_note, name='create_note'),
    path('delete/<int:note_id>/', views.delete_note, name='delete_note'),
]
We define the URL patterns for the project. The default route displays the list of notes, /create/ serves the note creation form, and /delete/<note_id>/ handles the deletion of a specific note.
Create templates
Create notes/templates/notes/base.html:
<!doctype html>
<html lang="en">
  <head>
    <meta charset="UTF-8" />
    <meta name="viewport" content="width=device-width, initial-scale=1.0" />
    <title>{% block title %}Django Notes{% endblock %}</title>
    <style>
      body {
        font-family: Arial, sans-serif;
        line-height: 1.6;
        margin: 0;
        padding: 20px;
      }
      .container {
        max-width: 800px;
        margin: 0 auto;
      }
      h1 {
        color: #333;
      }
      form {
        margin-bottom: 20px;
      }
      input[type='text'],
      textarea {
        width: 100%;
        padding: 10px;
        margin-bottom: 10px;
      }
      button {
        background-color: #4caf50;
        color: white;
        padding: 10px 15px;
        border: none;
        cursor: pointer;
      }
      ul {
        list-style-type: none;
        padding: 0;
      }
      li {
        background: #f4f4f4;
        margin-bottom: 10px;
        padding: 10px;
      }
    </style>
  </head>
  <body>
    <div class="container">{% block content %}{% endblock %}</div>
  </body>
</html>
This is the base HTML template, which provides the layout and structure for the pages. Other templates will extend this layout, using the block tags to insert page-specific content.
Create notes/templates/notes/create_note.html:
{% extends 'notes/base.html' %} {% block title %}Create Note{% endblock %} {% block content %}
<h1>Create a New Note</h1>
<form method="post">
  {% csrf_token %}
  <input type="text" name="title" placeholder="Title" required />
  <textarea name="content" placeholder="Content" required></textarea>
  <button type="submit">Create Note</button>
</form>
<a href="{% url 'list_notes' %}">Back to Notes</a>
{% endblock %}
This template displays the form to create a new note. It extends the base template and includes a form with fields for the title and content. Upon submission, the form sends a POST request to the server.
Create notes/templates/notes/list_notes.html:
{% extends 'notes/base.html' %} {% block title %}Notes List{% endblock %} {% block content %}
<h1>Notes</h1>
<a href="{% url 'create_note' %}">Create New Note</a>
<ul>
  {% for note in notes %}
  <li>
    <h3>{{ note.title }}</h3>
    <p>{{ note.content }}</p>
    <small>Created at: {{ note.created_at }}</small>
    <div style="display: flex; justify-content: flex-end;">
      <form method="post" action="{% url 'delete_note' note.id %}" style="display: inline;">
        {% csrf_token %}
        <button
          type="submit"
          onclick="return confirm('Are you sure you want to delete this note?');"
        >
          Delete
        </button>
      </form>
    </div>
  </li>
  {% empty %}
  <li>No notes yet.</li>
  {% endfor %}
</ul>
{% endblock %}
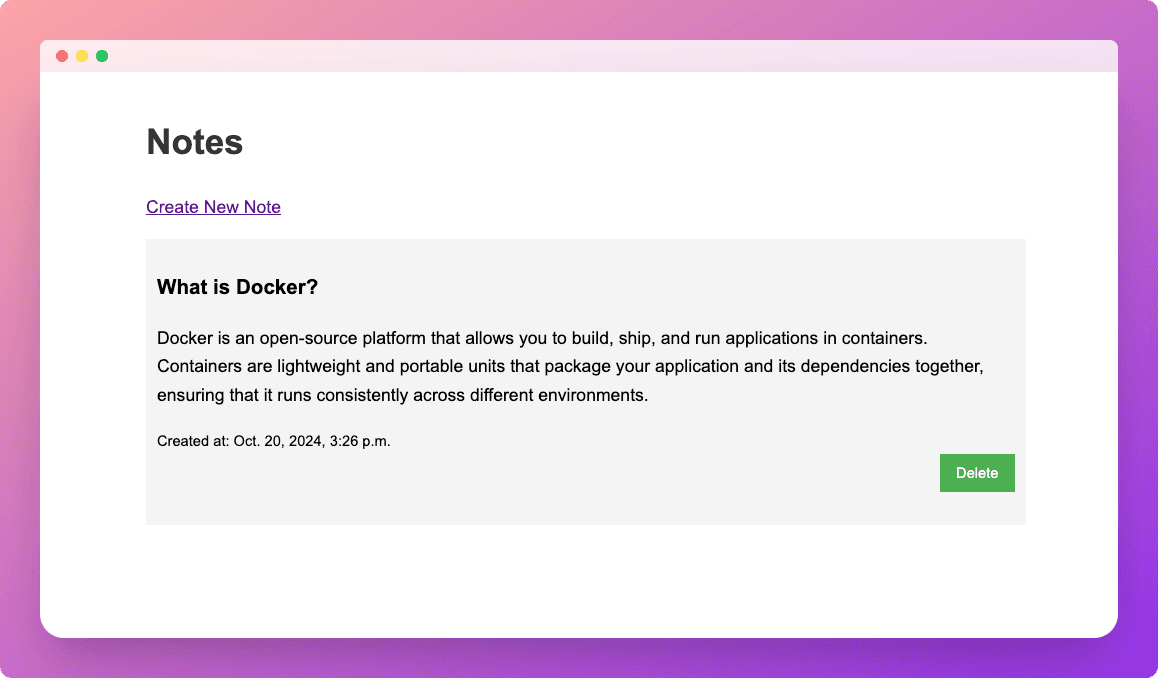
This template displays a list of all notes. Each note shows its title, content, and creation time. A delete button is also provided next to each note, allowing for easy deletion.
Run migrations and start the server
python manage.py makemigrations
python manage.py migrate
python manage.py runserver
These commands generate and apply the database migrations for the Note model and start the development server, allowing you to access the app in your browser.
Visit http://localhost:8000 to test the note-taking app.

Part 2: Use a read replica for read-only operations
Create a read replica on Neon
To create a read replica:
- In the Neon Console, select Branches.
- Select the branch where your database resides.
- Click Add Read Replica.
- On the Add new compute dialog, select Read replica as the Compute type.
- Specify the Compute size settings options. You can configure a Fixed Size compute with a specific amount of vCPU and RAM (the default) or enable autoscaling by configuring a minimum and maximum compute size. You can also configure the Suspend compute after inactivity setting, which is the amount of idle time after which your read replica compute is automatically suspended. The default setting is 5 minutes.
note
The compute size configuration determines the processing power of your database. More vCPU and memory means more processing power but also higher compute costs. For information about compute costs, see Billing metrics.
- When you finish making selections, click Create.
Your read replica compute is provisioned and appears on the Computes tab of the Branches page.
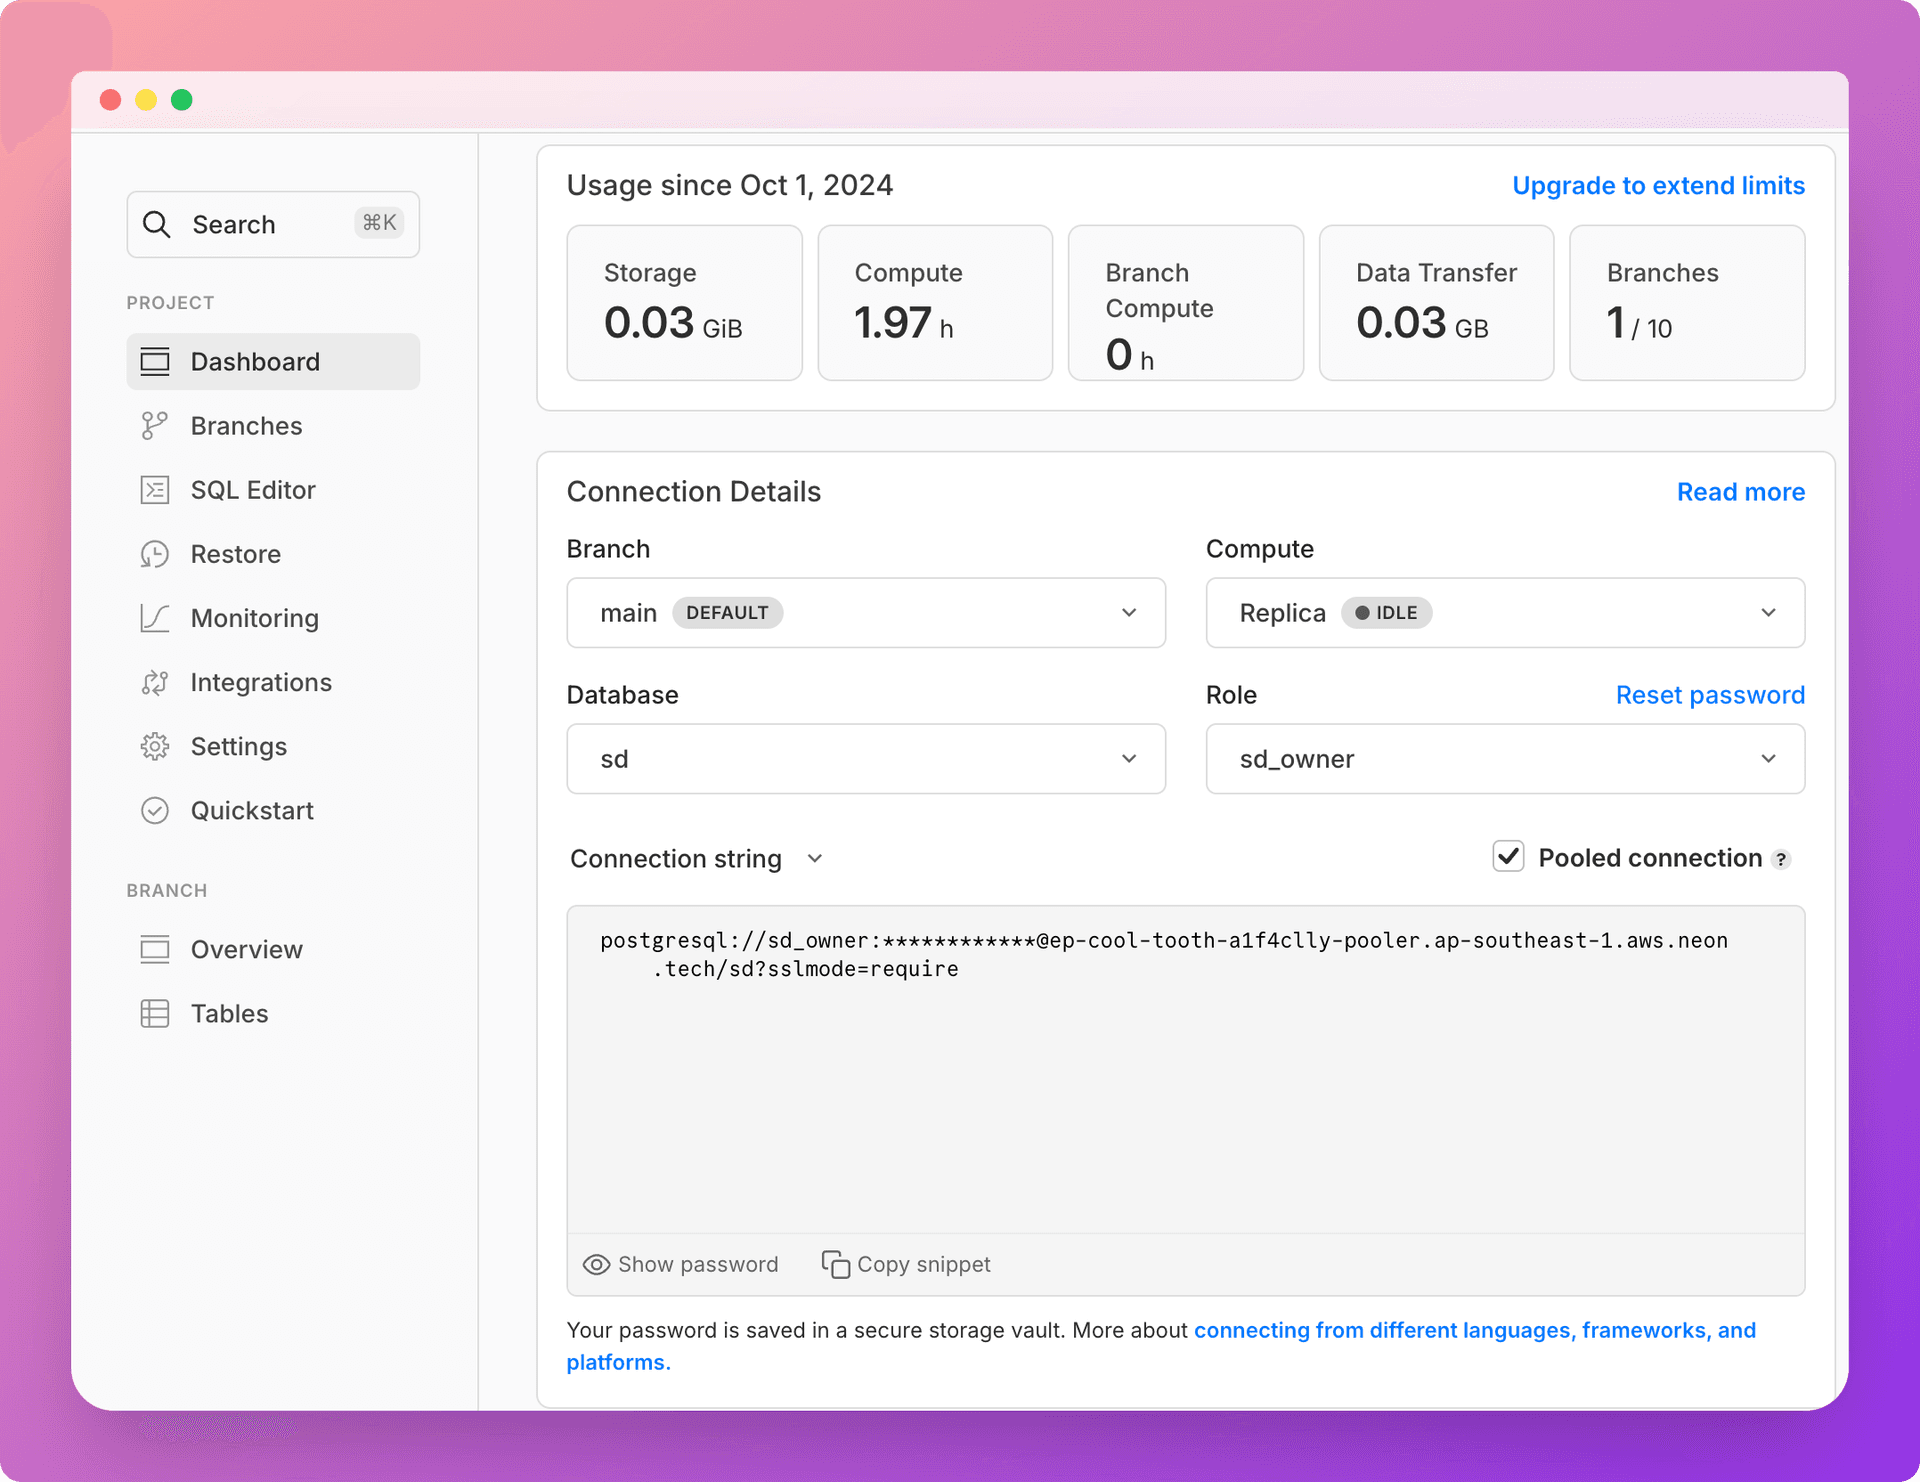
Navigate to the Dashboard page, select the branch where the read replica compute was provisioned, and set the compute option to Replica to obtain the read replica connection string:

Set up database routing for read replicas
Create a new file notes/db_router.py:
class PrimaryReplicaRouter:
    def db_for_read(self, model, **hints):
        return 'replica'

    def db_for_write(self, model, **hints):
        return 'default'

    def allow_relation(self, obj1, obj2, **hints):
        return True

    def allow_migrate(self, db, app_label, model_name=None, **hints):
        return True
This PrimaryReplicaRouter class defines the routing logic for database operations. The db_for_read method routes all read operations to the 'replica' database, while db_for_write directs write operations to the 'default' database. The allow_relation and allow_migrate methods are set to return True, allowing all relations and migrations across databases.
Update django_notes/settings.py:
DATABASES = {
    'default': {
        'ENGINE': 'django.db.backends.postgresql',
        'NAME': 'your_database_name',
        'USER': 'your_username',
        'PASSWORD': 'your_password',
        'HOST': 'your_primary_host',
        'PORT': '5432',
    },
    'replica': {
        'ENGINE': 'django.db.backends.postgresql',
        'NAME': 'your_database_name',
        'USER': 'your_username',
        'PASSWORD': 'your_password',
        'HOST': 'your_read_replica_host',
        'PORT': '5432',
    }
}

DATABASE_ROUTERS = ['notes.db_router.PrimaryReplicaRouter']
In the settings.py file, we define two database connections: 'default' for the primary database and 'replica' for the read replica. Both use the PostgreSQL engine and share the same database name, but have different host addresses. The DATABASE_ROUTERS setting tells Django to use our custom PrimaryReplicaRouter for database routing decisions.
With these configurations in place, Django will automatically route read queries to the read replica and write queries to the primary database, effectively distributing the database load and potentially improving your application's performance.
Conclusion
By leveraging Neon's read replicas in your Django application, you can significantly improve your application's performance and scalability. Django's database router makes it easy to set up and use read replicas without having to manually manage multiple database connections in your application code.
This setup allows you to distribute your read load across one or more read replicas while ensuring that all write operations are performed on the primary database. Monitor your application's performance and adjust the number of read replicas as needed to handle your specific load requirements.
You can find the source code for this application on GitHub:
Need help?
Join our Discord Server to ask questions or see what others are doing with Neon. Users on paid plans can open a support ticket from the console. For more detail, see Getting Support.